Friday, July 31, 2015

If I could turn back time

So a couple of days ago, it was my birthday. Two decades, plus one! Is it just me, or do the cakes get smaller, the older you get?


Well, that's probably a good thing too!

If I could turn back time, I would stay to myself - be exactly who you are. You're a plodder and a dreamer - you've tried being other things but it never stuck. You'll move a few mountains of dirt, you'll live 26 years with diabetes and have those two children, you never thought you could. Not to mention, the guy who you thought would never find you attractive, will want to hug you every day and fall into bed, right next to you, every night.

The cakes might get smaller, but my appetite for living, will only increase with age.

If you could turn back time, what would you say to yourself, to address any fears you might have had back then?


Monday, July 27, 2015

Hummus twist

I've had to change my diet over the years, as certain foods struggled to be digested. One of the more surprising foods I had to eliminate, was from the legume family. Out went peanuts, peanut butter and more devastatingly, chickpeas! Why chickpeas? Well, it was the staple ingredient for hummus - one of my favourite dips. I could snack on hummus without a side-dish of crackers. In fact, I preferred it straight.

So imagine how delighted I was to learn from a friend, that hummus can be made from other things than chickpeas. Dehydrated zucchini? Not only didn't I know you could make hummus from vegetables, but I didn't know you could dehydrate zucchini either.

Good things to know!


Use a food processor


So I looked in my crisper to find what I could use. Half a cauliflower and one zucchini later, I chopped and cooked them until softer, but still rubbery. I didn't want too much water in my dip, so the more the vegetables held their form, the better.

I even made my own Tahini sauce, which you can find the recipe for here. Its just sesame seeds and oil.


Ready to eat!


I whizzed everything up in my food processor, adding the extra flavours to taste. You can find the recipe I use for hummus, here and ground cumin is a must, plus lime juice instead of lemon. That is my slight variation.

But I have to tell you, this tasted better than any chickpea hummus I've made before. In fact, as I was cooking the cauliflower and zucchini, it smelled exactly like the chickpeas I cooked formerly. Its also easier than having to soak chickpeas overnight. And no heavy bloating after eating, either. Bonus!

Who knew you could eat zucchini and cauliflower, in a dip? I look forward to experimenting with other vegetables too.


Sunday, July 26, 2015

Weekend projects inside

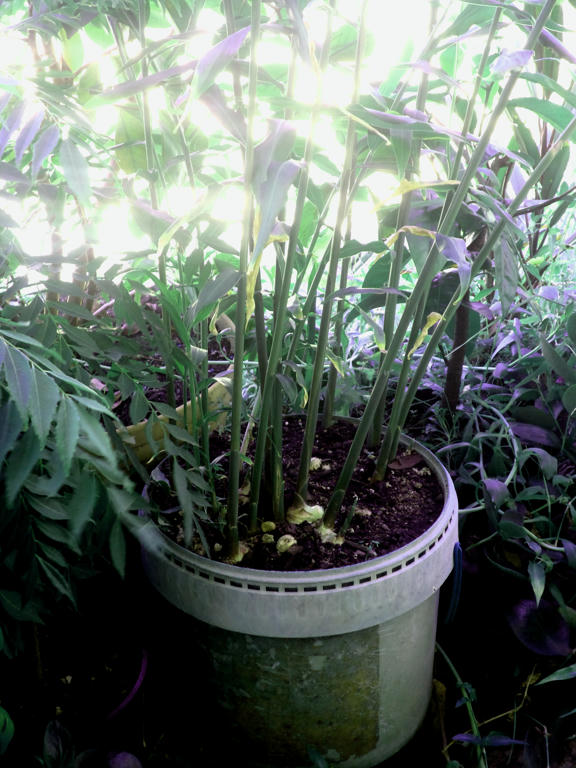
I'm late in updating my latest weekend project, namely because I decided to give the computer a rest for a while. The outdoors was calling and we had the time to indulge, so everything else got put on hold. I look forward to sharing some gardening endeavours, but for now its back to my weekend projects.

This was something I had been mulling over for a while. There's a lot of things I do on a daily basis, which wasn't organised very well. We currently live in the biggest house we've ever had (at four bedrooms) but its not a Mac Mansion. It doesn't mean the space we did have available however, was organised very well.

So I did a lot of online research, and borrowed a few ideas. Let me start with what I did in the kitchen.
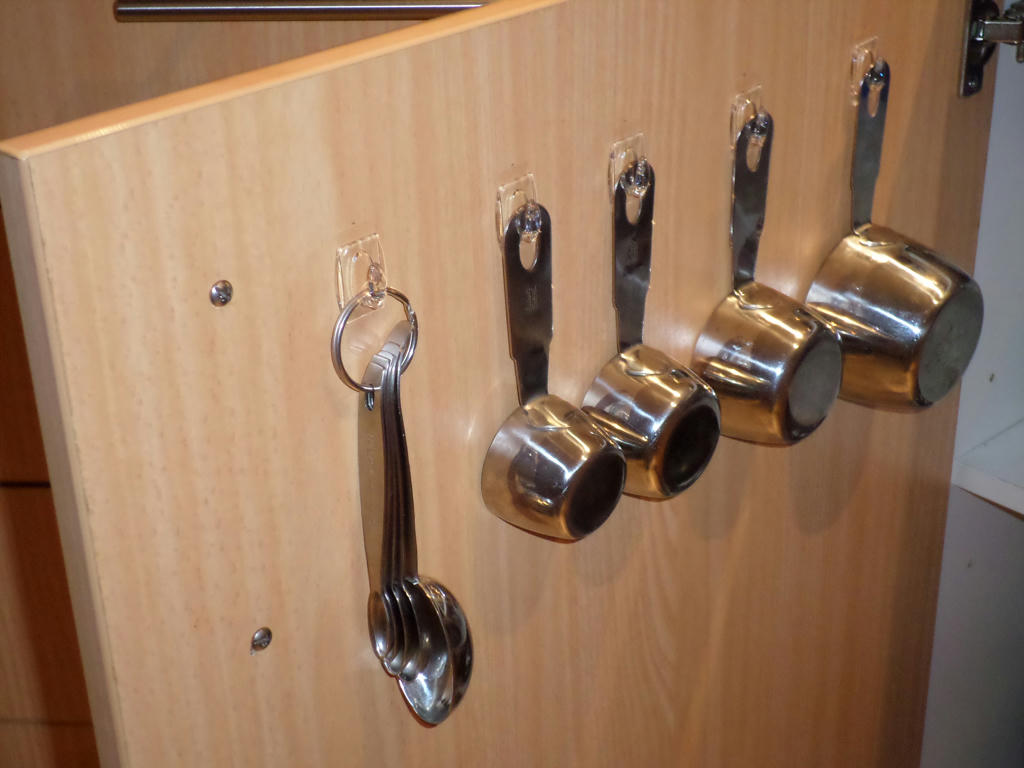

All in a row


I bought some clear "Command" adhesive hooks, which can hold up to 225g. I did a dummy-run, measuring out the distance between each hook, to give enough room for each cup measure, and for the measuring spoons. I'm happy to say, the hooks have stayed in place, even though this cupboard gets opened a lot.
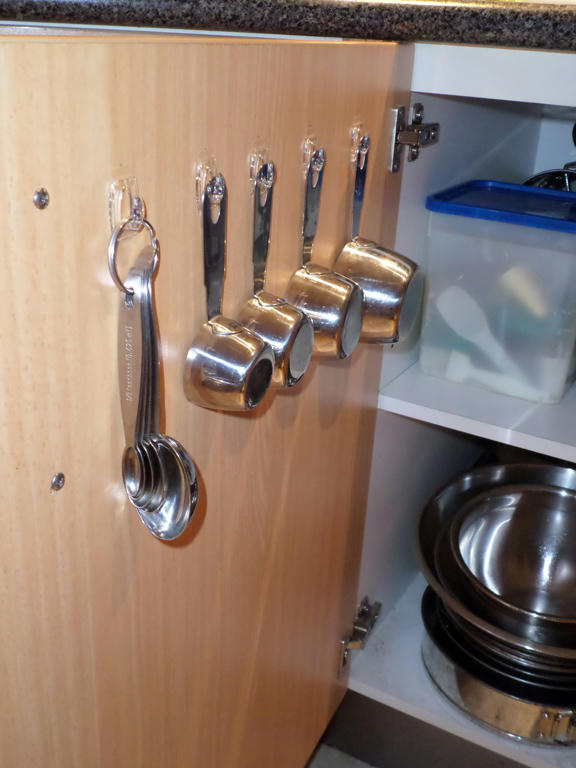

Functional storage


It's my baking cupboard, and the measuring cups and spoons once sat on top of the plastic container, with the blue lid. I used to have to open the door, stick my hand in and hope to grab the cups or the spoons (whichever I wanted) and drag the whole lot out. Now I just open the door and select which ones. No guesswork involved, because I can see exactly what I want.


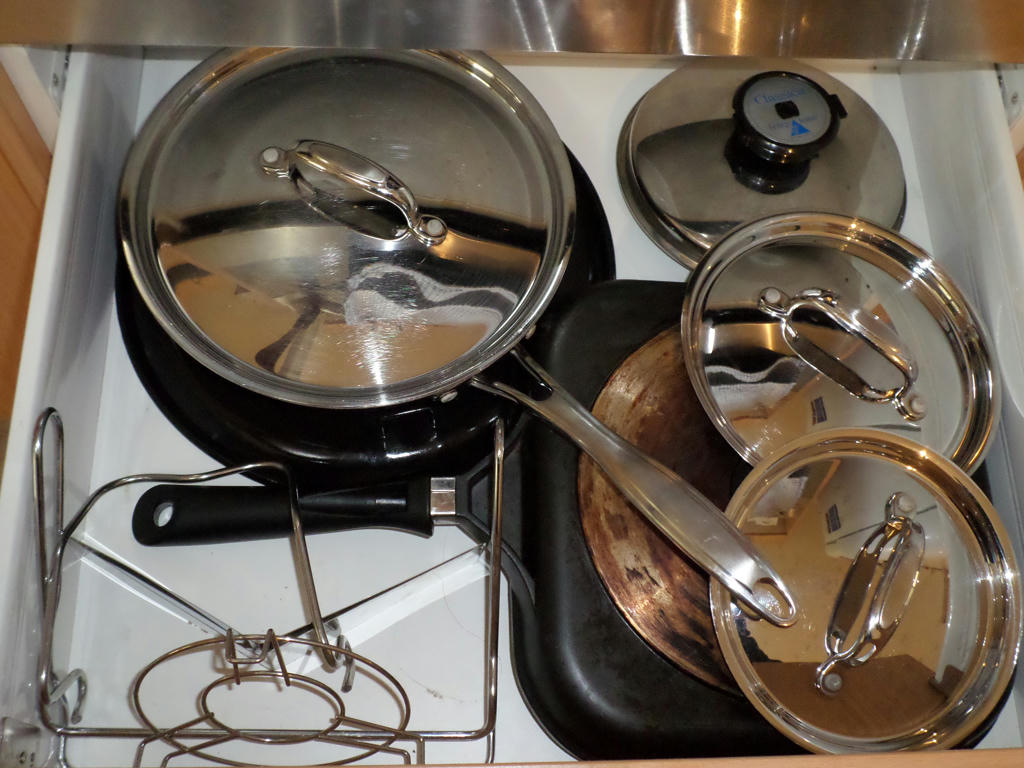
Stored, but not conveniently


Also in the kitchen, I had a problem with extremely difficult to store saucepan lids, which were constantly pushed around the frying pan drawer. An obstacle they are no more, thanks to a simple tea-towel railing.
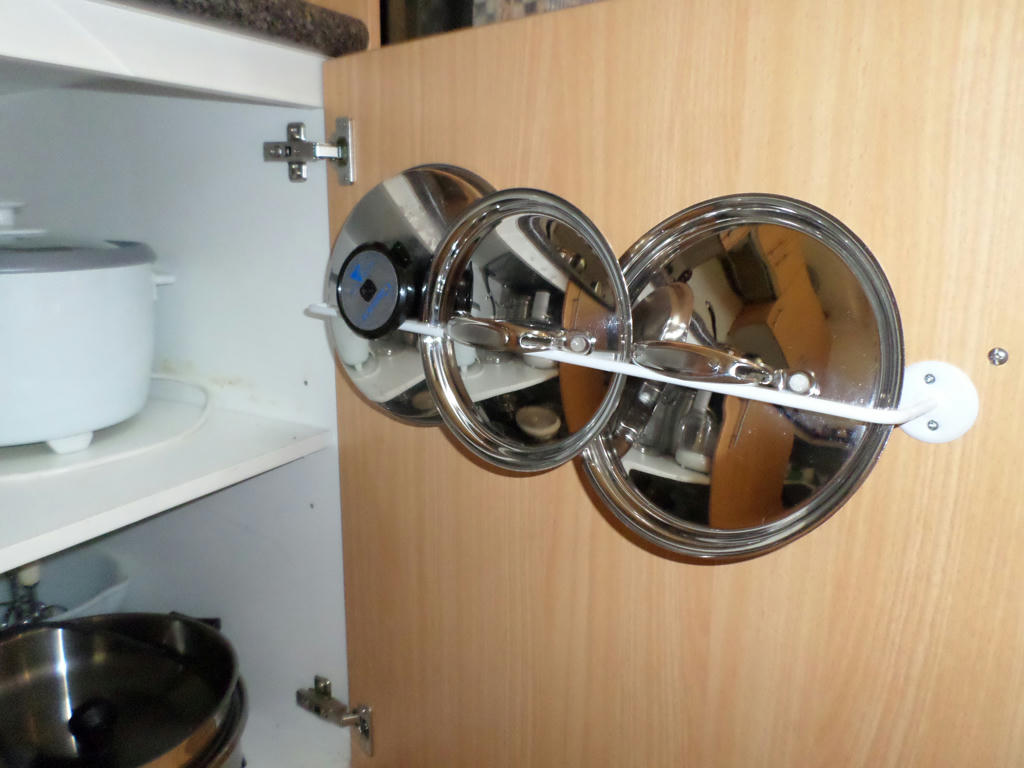

 Vertical space


These are now stored in the cupboard door, under the stove top. I did have to screw into the thin wood, as opposed to attaching by adhesive tape, but I don't imagine I'll be needing to remove this railing. I did a dummy-run with measurements again, being sure to take into account, the shelf in the cupboard and the lip at the very top. I also had to reorganise a few items in the cupboard, to make sure the railing didn't hit them, once the door was closed.


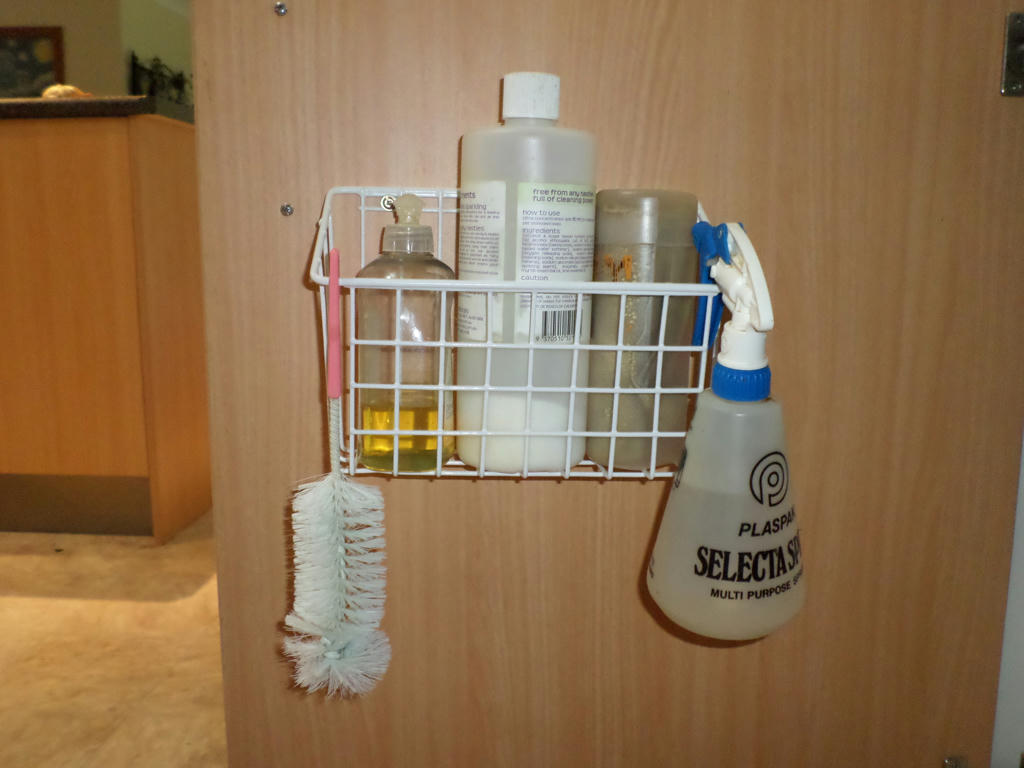
 Bottles of bliss - if stored correctly


This would have to be my favourite addition to my kitchen storage campaign however - a simple wire basket caddy. I use the vinegar spray, dishwashing liquid and powder for the dishwasher, regularly during the day. I also use the bottle cleaner quite a lot also, but had nowhere "airy" enough to store it.
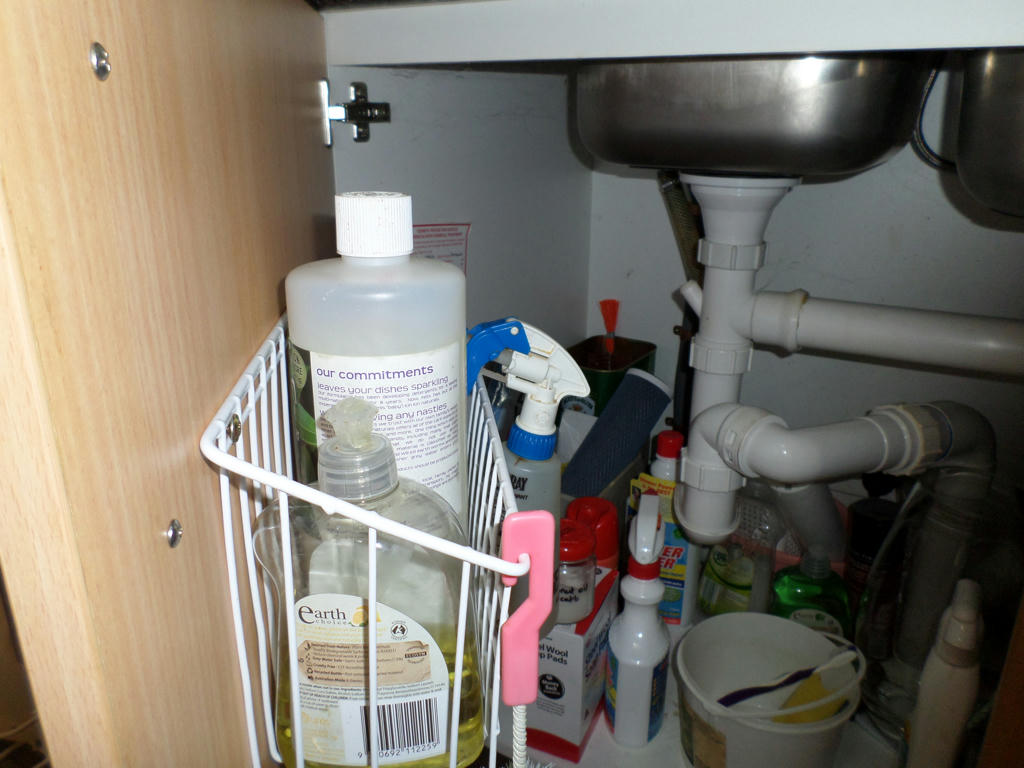

Ready to go!


Once again, I used screws to attach the caddy to the door, did a dummy-run, and made sure I could position it, so it filled the space between the door and the plumbing. Who needs that space right where all that s-bend plumbing is anyway,  except maybe for storing regularly used cleaning products?

The reason this is my favourite addition to the kitchen, is I no longer have to bend down to the lower shelf on multiple occasions during the day. I get to stand up straight, open the door and grab exactly what I want. I highly recommend this for people with mobility issues or back pain. I have a reasonably healthy back, yet I didn't realise what a relief it would be, not to have to bend down to that lower shelf for items I use every day. I can't believe I haven't done this one sooner.
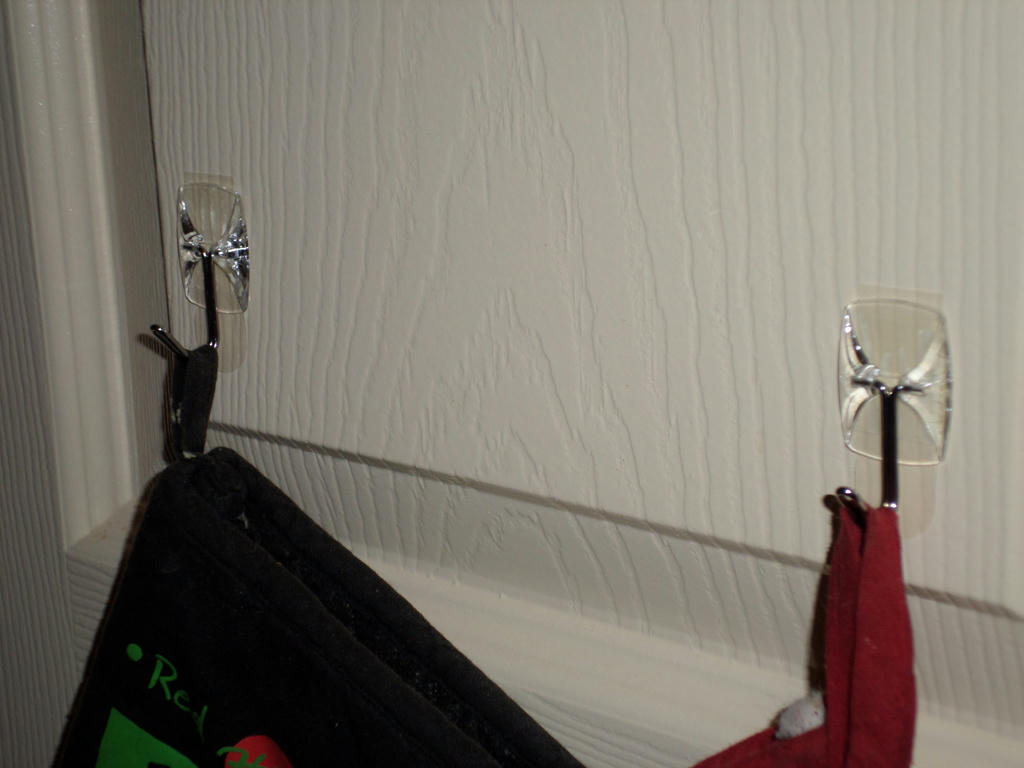
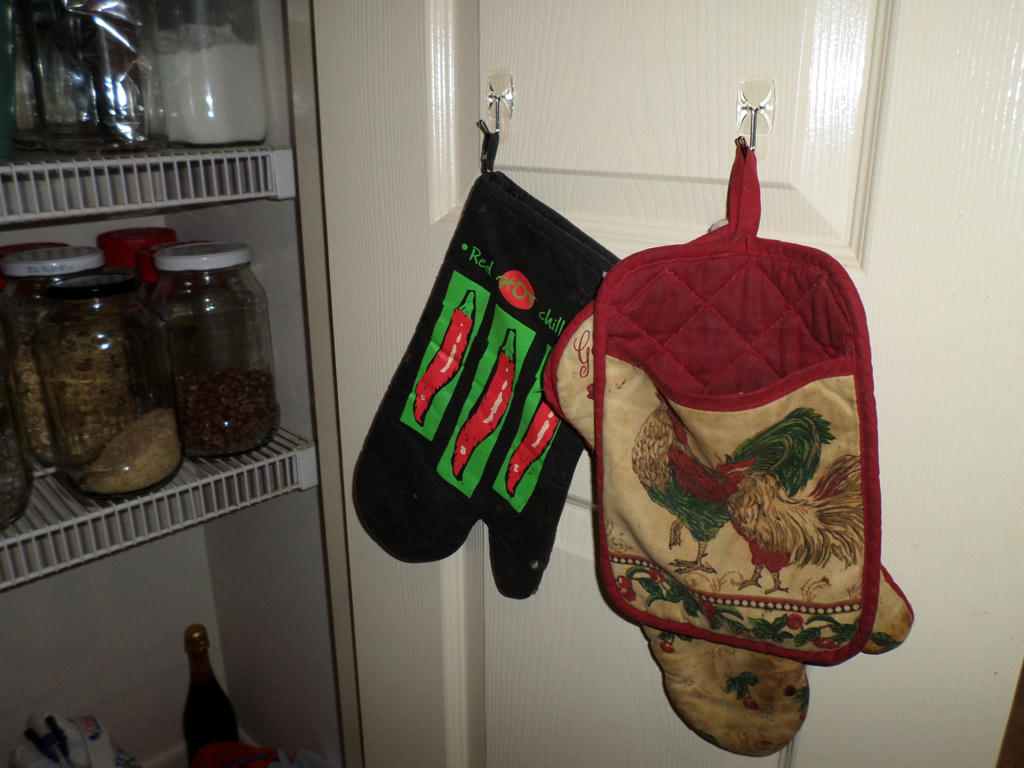

More hooks


Lastly, for the kitchen, is some more (can you guess) adhesive hooks. Only these metal hooks swivel. They're meant for hanging utensils, but I already use  an old pottery crock for that purpose. Who needs to have their oven mitts, taking up storage on the kitchen counter though, as mine previously were?


Tucked away, in the right space


My oven mitts are well loved, and now hung inside the pantry door. I didn't want them in the cupboards near the stove-top and oven, for safety reasons. The storage space it freed, was the heavy pot holder (trivet) they were formerly resting on the counter. I had to move the mitts first, then move the pot holder into position, before I could get to whatever needed removing from the oven or stove.

It may sound like a lot of trouble to go to for oven mitts and a trivet, but as a former professional baker and cake decorator, organisation is the key to any regularly used work space. If you have to double-handle things, when you're in the process of cooking, mistakes are easily made, things get dropped - it's just one of those days - or just too many stacked functions in the one space, with poor organisation? The simpler you can make your tasks, the more likely they are to run smoothly.


More organised - less drama


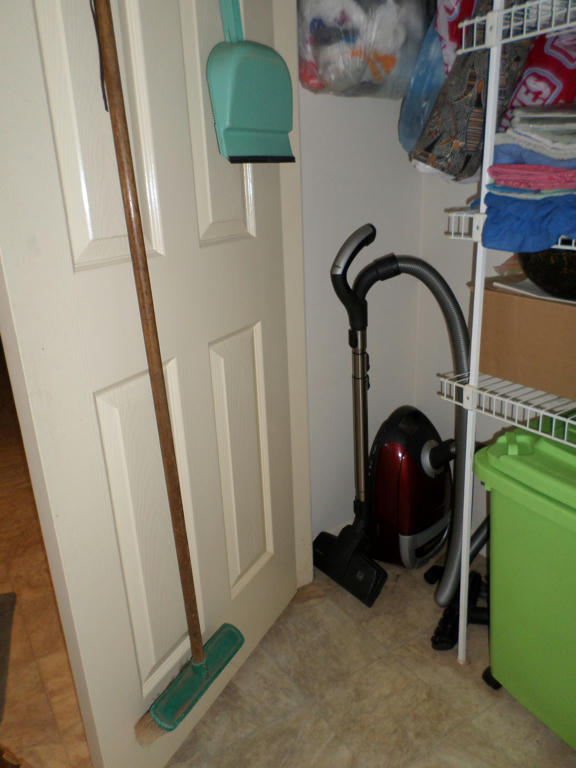
Right next to the kitchen however, is a storage cupboard. Its chock-full of stuff. So much so, that I would often have to battle with the vacuum cleaner, to get access to the broom and dustpan. I use them more than the vacuum, (daily almost) but I suddenly noticed all that space on the door! Why was I wrestling with the vacuum cleaner hoses for?


On a shoestring


This was another case of looking up, instead of down. I just had to drill a hole in the broom handle, tie a random shoelace through it (keeping an extra shoelace, when one of them breaks, is handy) and hung it from the hook.

This was the same brand of adhesive hook I used for the measuring cups and oven mitts, only it could hold up to 5 kilograms of weight. Even though my dustpan and broom, would come nowhere near that - I also had to take into account, the extra weight the item would pull on the hooks, when the door is swung open. To date, everything has stayed in place.

If my cupboards were made of solid wood, I would have preferred screw-in, metal hooks. You can even get fancy, and make hooks out of all sorts of things. Whatever system works best for you, so don't feel like you're only limited to pre-made storage solutions.

I also made some storage changes to the bathrooms, as well, which I'll share another time.

Are there changes you made to your kitchen work spaces, where you thought, why didn't I do this sooner?

Wednesday, July 15, 2015

Ginger finally!

I've tried growing ginger every year. I was always too impatient with ginger though. As soon as spring arrived, I put the rhizome in the pot and watered it like mad, knowing that ginger loves moisture, right?

Well it loves moisture, but it can rot with too much - especially if the heat isn't there to take it up. That's what happened to former plants. After nearly killing off the next lot, I put them in a pot I intended to treat like royalty. Just enough water, indirect sunlight and plenty of heat - compliments of summer.

 March 2015


To my surprise I got stems which weren't showing yellow tips (lovely green ones instead) but also the clumps started to expand. I knew this when the initial plastic pot they were planted in, started to buckle. I used all my larger pots for fruit trees, and I didn't want to buy plastic, if I could recycle something instead.


 March 2015


That's where 10 litre plastic mayonnaise buckets, my husband brought home from work, came in handy. They had lost their handles from living outdoors, but made the perfect size to transplant my ginger all the same.

So now is the telling of how well that ginger has grown.


July 2015


The pictures aren't that great, because I had to race outside to harvest some ginger, to put in my lime marmalade I was cooking at the time. But it was a pretty substantial haul. I started with about 4 small pieces, and one of them turned into this...


A hand of ginger!


This was the biggest rhizome. I grated some ginger for my marmalade, and also added some to my Thai soup I made the other night - along with some freshly grown coriander. Talk about winter warmers! Nothing beats Thai soup and the tingling sensation of fresh ginger.

I'm now thinking of how I can create the best conditions in the garden for ginger to grow, because I don't want to be limited by the space in pots any more. Time to do some research.

If you want to know more about growing ginger, I found this article simple to read but full of all the important points.

If you're more a visual person, I found a video which shows how easy it is to grow ginger in containers. She has extremely fat rhizomes, which I think is due to her use of compost. Everything grows bigger in compost!


Or perhaps maybe she is growing a different variety of ginger, I certainly think its big and beautiful though!

Ginger, ginger, GINGER! Its soooo worth it.


Monday, July 13, 2015

Weekend projects inside

Technically, this project was done outside (for safety reasons) but because it lives inside the house the rest of the time, I'm categorizing this weekend project for, "inside".

Inside is where I have been spending a lot of my time recently, looking after our littlest, which I only realised after the rash appeared, had the measles. By the time I started my weekend project though, he was well on the mend.

This was the project I was going to start last weekend, but got sidetracked by rats. See if you can figure what it is, by these clues...


Note the wooden piece, near the red clamp


First, I gathered the tools I would need and put them on my outside table. It's not a pretty table, but its for outside, and comes in handy for such projects as these.


2 x 5kg


Then I raided my husband's barbells for 10 kilos of weights. I will be borrowing these for at least 3 weeks!


Fiddly


Then it was time for the wooden jigsaw puzzle, which I had been promising for at least 3 Christmas's (possibly even 5) that I was going to fix before guests arrived. I will finally tackle this project, by Christmas 2015!


Missing piece


There were some pieces which had broken off, which shouldn't have, because I didn't act hastily enough with this project. I kept the little piece (above image, near red clamp) for years, hoping one day, I would put it all back together again.


3 x clamps, plus 1 rope tourniquet


Yes, its a chair! And I've only got 5 more to go. Because I'm using Epoxy glue (strong stuff) I have to wait 4 days for the glue to cure to its maximum strength, before any of the clamps can be removed. I figure that will let me do two chairs a week. 

The weights are to add pressure to the joints, as if a person were sitting on it. I was told this helps set the chair more evenly. Ten kilos isn't much weight compared to a person, but it was better than nothing. Besides, I didn't want to deprive my beloved of too much weight, from his training sessions.

While it will take longer than a weekend to finish this project, I can complete a chair in a few hours - taking my time. So it's easy enough to fit into a weekend, over several weeks.


Monday, July 6, 2015

Weekend projects outside

Well I was planning on a completely different project this weekend, however, my recent warfare campaign, required re-enforcements. I pulled grass and moved soil to cover in the rat tunnels, but I had to come up with a way for the plants to grow on this particular slope.


Before


I have always struggled for plants to grow here, as it can get quite dry. Slopes drain extremely well. That's when I realised I had to go down a level. Or should that be, go up a level?


After


By installing a small retaining wall, a good metre away from the larger one, I created a reduced slope to allow rain to seep in, as opposed to run down hill. The wall ends at the Dianella grass (background) and I intend to continue it after the Dianella. Apart from the fact I didn't want to dig up the grass, which I planted and wanted to grow - it allows any water that comes off the walkway, to drain down into the new plateau I made.


Mondo (left) Rhoeo (right)


The above image is in my sidebar, and it was taken when we first installed the lower wall. The original Mondo grass and Rhoeo have lived, but many other plants haven't. I was a little more hopeful when I planted some larger specimens, which I rescued from other parts of the garden and nursed back to life, in pots.

The time I spent on this area recently, I collected three paralysis ticks for my efforts, and one of the neighbours dogs decided to poop in this area, so I trod in it, while digging. Otherwise, it was a successful weekend project.


Sunday, July 5, 2015

Guest post

I wrote a guest post at a blog I like to frequent, to think about the bigger picture. Many of the articles coincided with thoughts I'd been having myself. So was very happy when my post was accepted. 

If you think about the future, and how we can possibly make a difference, head over to I Hear Ecos. It's talking about the future, even if its not pretty and we don't have all the answers yet.


Friday, July 3, 2015

This means war

Normally I embrace all the native wildlife who use our backyard as their home. They help improve the ecological balance, which I'm interested in as a gardener. One particular species however, have officially worn out there welcome.

So now, this means war...


I didn't have time to take photos of their carnage, as it was a fresh assault, and they probably only had a week to dig their tunnels. I wanted to deal with it straight away. But here is the after picture, of my cleaning up their mess. This was overgrown with long grass, which gives them perfect cover, for digging their network of tunnels.

I'm fairly certain they're native bush rats, not the European variety, as we've seen them occasionally in and around our chicken coops.


They had managed to push out small rocks from our retaining wall, and even pushed over a tennis ball which was probably lost in the garden bed, filled with grass. I first noticed their work, by the giant pile of dirt underneath the wall. I had to try to fill in the holes, both above the wall and in the face of it.

It's not an aesthetic thing which worries me though, its the stability of the wall, and more importantly, when I walked on the bed above, I fell into holes as their tunnels collapsed. That's dangerous, and why they can't stay.

The rats probably started digging these fresh tunnels, after we evicted them from our crushed garden shed.


Did I forget to mention, we had a tree come down on our shed, squashing the gable and popping out the back corner? See all that grass! Perfect cover for bush rats, so a great place to build a nest, or two! It took us 5 weeks to order in a new shed, so they had that time (with us not visiting the shed at all) to set up house.

When I went to look for some paint for my recent weekend project, to rejuvenate the letterbox, that's when I heard them scuttling around. When we pulled out some of the stuff, we found a nest and smelled rat wee. The acidic nature of their wee, even started to eat away at the metal coating on our stand-up shelves.

More on our renovation rescue, in another post, but needless to say, when we evicted their nests and closed up the hole, they went looking for another abode.


So that's how I knew it was a fresh assault. That, and the fact it was fresh soil which didn't have time to dry out in the sun yet. After pulling out all the grass in the bed above the wall, and filling in the holes, I threw some prickly rose prunings, on top, as a deterent. I was fully expecting to see some digging around this morning, but no sign as yet.

I suspect it has to do with the long grass I pulled out of the bed, as it gives them cover from aerial predators (especially owls at night, when the rats are most active). I didn't waste the grass though.


It made excellent mulch for a nearby mandarin tree. I use grass and weeds for mulch, even when they've gone to seed, because its a free resource and anything which does re-grow from seed, is leggy and easily pulled. Besides, I only end up with more free mulch, if anything gets away on me.

Regarding the war on rats though, we don't intend to trap or poison. Just good old-fashioned, pushing them out of our territory. They can have the other 4 acres, just not the areas around the house we visit the most.

Strategies for deterring them includes, pulling out long grass and using our grey water to establish the plants we want to grow. These plants will probably provide them cover too, but will have matted up the soil with the fibres of their roots. Grass tends to have shallow roots they can dig under, so we want plants with more vigorous roots.

Unfortunately, they've also done damage to some of our block retaining walls too.


This is an earlier picture, when we first really used the space above the wall as a vegetable bed. Since its been mostly over grown by grass and only visited occasionally to turn the compost heap, the rats have moved in.

We won't concern ourselves with that area though, until we plan to use it again. Which we will. Right now, we need to get on top of a few projects, like fixing the shed and what to do with all those pieces of sheet metal left over.

More to come.